Sunday, June 29, 2008

Color mania!

It's been one of the toughest things to figure out: How to tie in our furniture, kitchen counters, our new 1970s brick fireplace with a few gallons of paint. The problem is that when you walk in the front door, you can immediately see the living room, dining room and part of the kitchen (which only has a breakfast bar separating it and the dining room.) Oh, and we'd like to avoid painting the brick or buying new furniture. Here's a sketch of the layout:


The goal is to paint as much as possible before the floors and furniture go in - it's just easier. So these are the color palettes I've come up with. (Bearing in mind this space still looks like a complete construction zone.)


The back wall spanning the kitchen and dining room (as well as the rest of the kitchen) will be painted in Sherwin Williams Drizzle or Watery. The long wall running from the dining room to the living room will be painted Sherwin Williams Cachet Cream. This was the toughest color to come up with because it's got to coordinate with all three spaces. The hallway and front wall of the living room I plan to leave untouched for now. I'd like to paint them a shade or two deeper than Cachet Cream, but I want to make sure it's not going to be too much once the furniture is in. Here's a layout with some of the colors inserted.


Thoughts? Ideas? I'd love your input!

Friday, June 27, 2008

Thinkin' about the doorbell


This is the plastic 1970s doorbell cover that you see directly in front of you when you come into the front door of our house. Any ideas on what to do with the homily thing? Buy a new cover? Make something out of wood and cover with fabric? I'd love to hear your suggestions...

Wednesday, June 25, 2008

Just when it seems it will never end...

We finally made some progress! Our contractor Sean is letting Paul borrow his battery-operated brad nailer, which has increased the speed of the bamboo-floor-laying considerably. On top of that, the kitchen cabinets are being hung, the dining room wall is down, and the bathrooms are being tiled. In short, it's finally looking like a house again.

I'm quite happy with how the tile in the guest bathtub had turned out! I gambled and picked up a box of thin white tiles to make a stripe inside the bath. I was hoping it would tie in the edge tiles (which I could only find stocked in white, and didn't want to special order.)

The next dilemma - kitchen lighting. We've decided to go with a ceiling fan (ugly, but a good move in a house with no A/C), pendants above the breakfast bar, and a light fixture above the sink. Finding them all to match in a style we like is hard work. And of course the pendants I like from Lowe's aren't sold in New York. Next stop - ebay. And tonight, test paint swatches go up in the living room and kitchen.

Kitchen taking shape

Guest bath

Monday, June 23, 2008

Bamboo on the way down

It was a slog this weekend experimenting with the best way to lay our new bamboo floors. The floors are Yanchi Ecoline strand woven bamboo from Build Direct, a flooring liquidator in Vancouver, British Columbia. I can't say enough about their products and service.

Paul and our friend Joshua (many kudos for his relentless help this weekend!) started off Saturday morning with a manual hardwood flooring nailer, which regularly split the floor boards. Not good. Since we went with the economy bamboo, the tongues are thinner than traditional wood floors, and bamboo is known to be brittle anyway. After struggling with that for half a day, they switched to pre-drilling holes in the tongues and then hand-nailing the floor down - a huge improvement on the splitting front, but an agonizingly slow process.

Sunday morning I was off to Home Depot to find a better solution. I came back with a rented pneumatic finishing nailer and a compressor. After experimenting with depth and pressure, we settled into a routine that still involved pre-drilling, but went considerably quicker. We finished the guest room, and got started on the baby's room - not as much progess as we would have liked in a weekend, but hopefully our new system pays off.

The miraculous nail gun

Flooring installed

Saturday, June 21, 2008

Come along for the ride

We're a few weeks into this major project that Paul and I have embarked upon - namely buy a semi run-down house, gut it, and fix it up. And it's dawned on me that we're learning a lot that could be useful. So this will be the story of the making of our new, humble abode in Ithaca, New York.

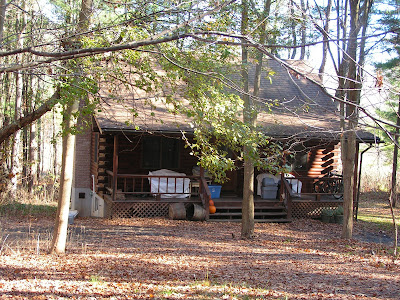
Because I'm starting up this blog well into the process, I'll play catch-up for the first few weeks to bring you up to speed. For starter's, here's where we live now.

And here's where we headed.

Our realtor fondly referred to the style as a "raised ranch." There is a 1200 square foot, three-bedroom home upstairs and a 1-bedroom apartment downstairs. (We'll be renting that out to defer the cost of taxes in New York.)

The house - and most of the others on our block - were originally built in the 70s as rental properties and were later sold. The previous owners of our house were veterinary students who graduated and moved out this spring. (Yes, there was animal dander everywhere!) So that's the start. Stay tuned for the details.